Introduction

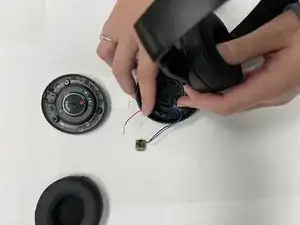
This is a charging port replacement guide for the Beats Solo 3 Headphones, Model number A1796. Symptoms that suggest the need for a charging port replacement can be found on our troubleshooting page.

  1. EfcFmCPZTlwWh4w4
    • Use a nylon or metal spudger to carefully remove the ear pad from the right ear cup.

    • Be careful to not rip the ear pad fabric with your tools.

  2. Qd2wP66uQOslLaAe
    • Use a Phillips #00 screwdriver to remove the seven screws that hold the speaker in place.

    • There are two screws in the big red circle at the bottom.

    Beats Solo 3 only have three screws securing the speaker cover to the main part? Top, bottom left, bottom right. Not five?

    Duncan Ramsey -

  3. Icyie6TXOwRBVEOT
    • Desolder all wires connecting the circuit panel to the rest of the device.

    • There are two wires in the big red circle at the bottom and one in the small red circle above.

    You like to see a top view of the charging port what it looks like when you plug it in a blown up view of it please thank you

    Kevin -

    Why are you desoldering the speaker also if this is just a charger port replacement?

    Duncan Ramsey -

  4. 1iYDg4qWpnHbVlOn
    1iYDg4qWpnHbVlOn
    hR24Jp1DhJ4pXMQv
    • After you desolder all wires you are able to remove and replace the charging port.

    Arguably the most important piece of info needed for this job is confirming which wires are which on the charger cables.

    From meet to right, screw holes at the top, I believe they are:

    Black wire-

    Red 5v

    Bare wire GND

    Blue wire-

    Red/blue DM

    Bare wire / green DP

    ?

    Duncan Ramsey -

Conclusion

To reassemble your device, follow these instructions in reverse order.

Abdulaziz Alotaibi

Member since: 21/03/22

179 Reputation

0 comments