Introduction

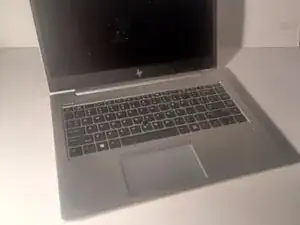
If your HP Elitebook 745 G6 battery isn't holding a charge anymore, use this guide to replace it.

For your safety, discharge your battery below 25% before disassembling your laptop.

NOTE!: If the bottom of your laptop is bulging, you may have a swollen battery. Take the necessary precautions, and do not continue with the repair while this is happening!

  1. 2FKaIFQikFiQ6uGB
    2FKaIFQikFiQ6uGB
    RmiwmMWwlSfeZXOf
    • To avoid data loss or damage to your laptop, discharge the battery below 25% and power off the device before beginning disassembly.

    • Hold the power button for 5 seconds until the laptop shuts down.

  2. hNKZEtOC6T5sGDWR
    hNKZEtOC6T5sGDWR
    MK3cnZXdusOEjuQM
    • Loosen all eight 4.5 mm captive Phillips #1 screws securing the lower case.

    • Do not attempt to fully remove the screws. They are intentionally held in to the back of the board with stoppers. This will not prevent you from opening the case.

  3. WHBhBkSaF2oy4JQd
    WHBhBkSaF2oy4JQd
    RVUkJReZ3ihiSJeM
    BLHa3MqpLoLXsGru
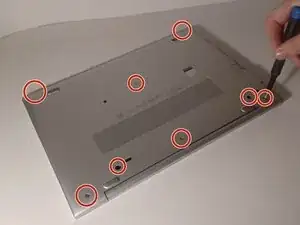
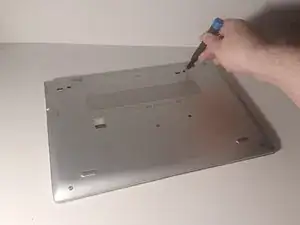
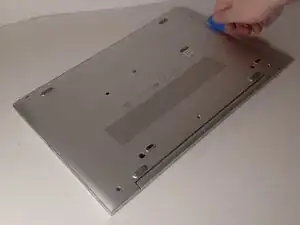
    • Insert an opening pick into the seam between the lower case and chassis.

    • Run the opening pick along the entire perimeter of the device, prying every couple of centimeters, until the lower case fully releases.

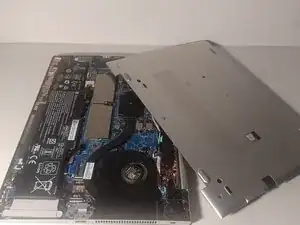
    • Lift the lower case up and off.

  4. TIhVJeHvvXPBfUcZ
    TIhVJeHvvXPBfUcZ
    3WtDNaWsbcISvxG5
    Cej4sZOfxupGKTGA
    • Use a T8 Torx screwdriver to remove the five 4 mm screws that secure the battery.

    • These screws are very small. Take care not to lose them.

  5. KlkZHPmNrH14qaJa
    KlkZHPmNrH14qaJa
    WkWD2MEBbnjCbKUc
    HOldKfijKLxTOOW4
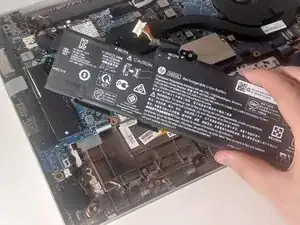
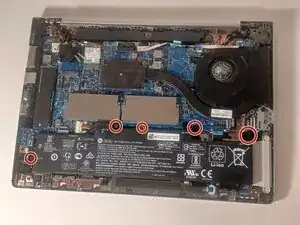
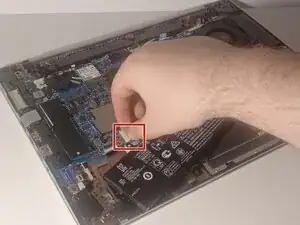
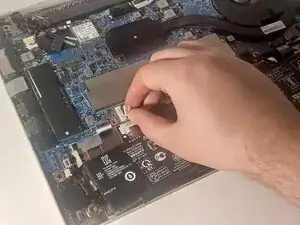
    • Pull the white battery connector directly out of its motherboard port.

    • Grab the connector by the two tabs, and not by the wires.

    • It does take quite a bit of force to disconnect the cable. Try wiggling it back and forth while you pull it out. Still, exercise caution to not damage your device.

    • You can also use opening picks to disconnect the battery if you have short fingernails.

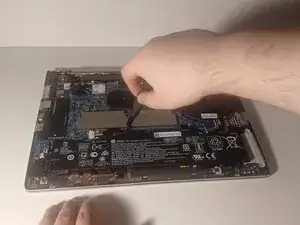
    • Lift the battery up and out of the chassis.

Conclusion

To reassemble your device, follow the above steps in reverse order.
For optimal performance, after completing this guide, calibrate your newly installed battery.
Take your e-waste to an R2 or e-Stewards certified recycler.
Repair didn’t go as planned? Try some basic troubleshooting or ask our Answers community for help.c

Sepehr Karahrodi

Member since: 14/01/25

122 Reputation

0 comments