Introduction
If your Lenovo IdeaPad 1-15ALC7 has begun producing crackling, distorted, or no sound at all, even after checking your software settings and updating your drivers, the built-in speakers may have failed and need to be replaced. Speaker damage can occur over time due to dust buildup, moisture exposure, or simply wear from everyday use, and replacing them can restore your laptop's audio performance without the need for an entirely new device.
This repair involves opening the laptop’s bottom cover, which will require a Phillips screwdriver and a Jimmy prying tool to avoid damaging the casing. You’ll also need to carefully disconnect internal cables, so be sure to work slowly and stay grounded to avoid static discharge, which can harm sensitive components.
Before starting this replacement, make sure your laptop is fully powered down and unplugged from any power source. It is especially important to follow the steps in the guide to safely disconnect the battery before handling any internal parts.
This guide will walk you through each step to safely remove and replace the speakers, so you can get back to enjoying clear and reliable sound from your device.
-
-
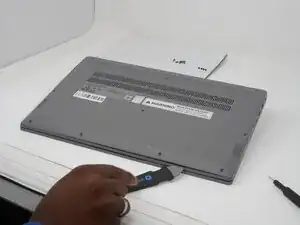
Unscrew and remove the T5 Torx screws that secure the lower case:
-
Six 6.5 mm screws
-
Four 5 mm screws
-
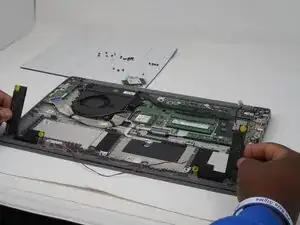
Insert a Jimmy into the seam between the lower case and chassis.
-
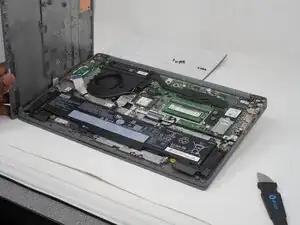
Pry around the entire perimeter until the lower case fully releases.
-
Remove the lower case.
-
-
-
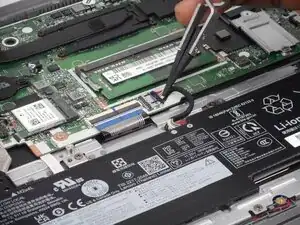
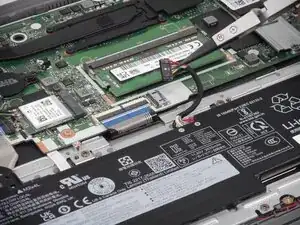
Use tweezers or your fingernails to gently "walk" the battery connector directly out of its motherboard socket.
-
-
-
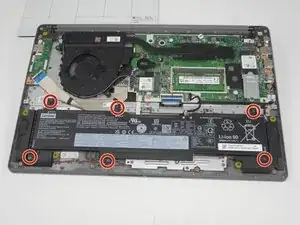
Remove the six 5 mm Phillips #000 screws that secure the battery.
-
Lift the battery up and out to remove it.
-
-
-
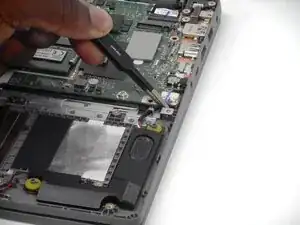
Remove the three 3 mm Phillips screws that secure the trackpad bracket to the chassis.
-
Remove the bracket.
-
Disconnect the speaker connection from its motherboard socket.
-
Carefully lift the speakers up and out to remove them.
-


To reassemble your device, follow the above steps in reverse order.
Take your e-waste to an R2 or e-Stewards certified recycler.
Repair didn’t go as planned? Try some basic troubleshooting or ask our Answers community for help.