Introduction
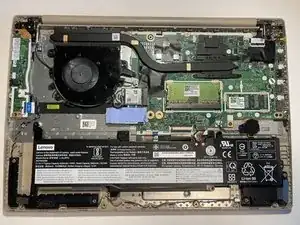
This guide provides step-by-step instructions for replacing the Wi-Fi card in your Lenovo IdeaPad 3-15ADA05. Whether you're experiencing connectivity issues or looking to upgrade for improved performance, this guide will walk you through the process.
Before you begin, ensure the device is completely powered off and disconnected from any power source to prevent potential injury.
-
-
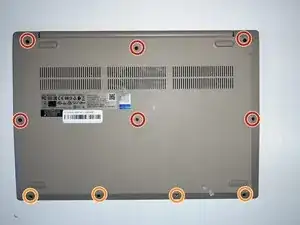
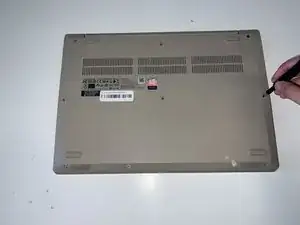
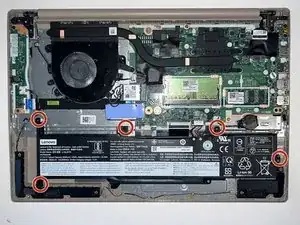
Remove the six 5 mm screws located at the top half of the laptop using a Phillips #0 screwdriver.
-
Remove the four 2.5 mm screws located at the bottom of the laptop using a Phillips #0 screwdriver.
-
-
-
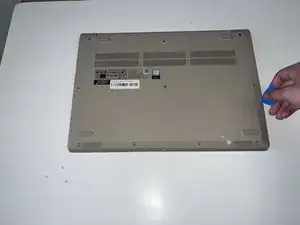
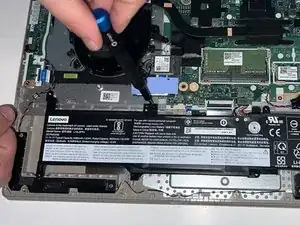
Insert the opening pick between the base plate and the bottom of the laptop and pry the clips loose around the edge until the base pops off.
-
-
-
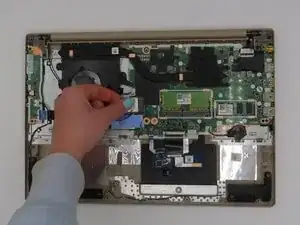
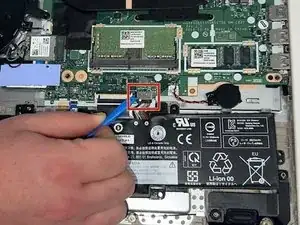
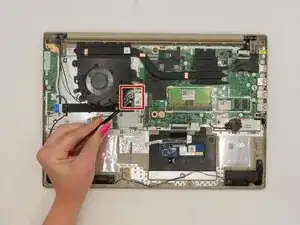
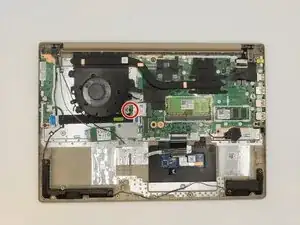
Using the opening tool, disconnect the battery connector from the motherboard, and then remove the battery.
-

To reassemble your device, follow these instructions in reverse order.