Introduction
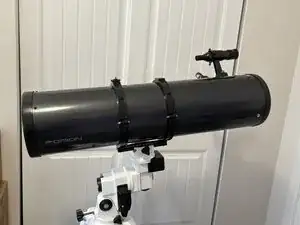
The Orion Skyview Pro 8-inch Equatorial Reflector Telescope has no built-in collimating systems and should be manually collimated every few months. This guide will show how to quickly collimate the Orion Skyview telescope using a laser collimator.
Correct collimation of the telescope's primary and secondary mirror allows for optimal focus and light-gathering, producing the highest-quality image. You can test to see if your telescope needs to be collimated by focusing on a bright star and checking for any blurriness or distortions to the star's shape. Distinct streaks or non-round star shapes may indicate that your telescope needs to be collimated.
This collimating process can be a bit finicky and requires a lot of trial and error/fine-tuning from the user. If this is your first time collimating a telescope using this technique, I would recommend taking it slow until you have a better understanding of your particular telescope.
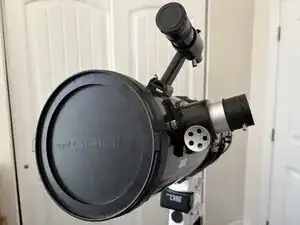
Before using this guide, mount the telescope onto the tripod.
Tools
-
-
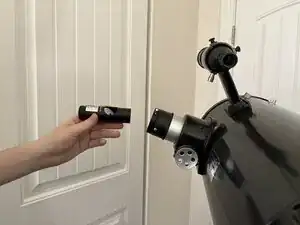
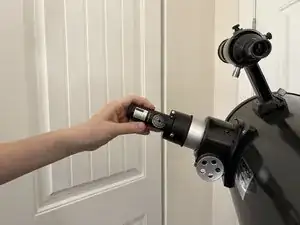
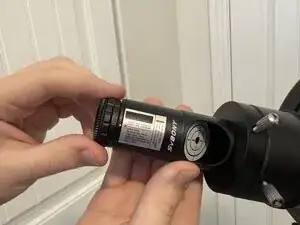
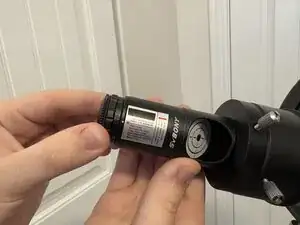
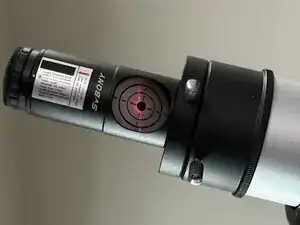
Turn the end of the collimator from off (0) to the brightest setting (7).
-
Twist the metal knobs on either side of the eye-piece hole to lock the collimator into place.
-
-
-
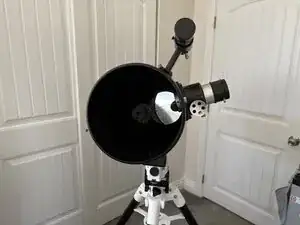
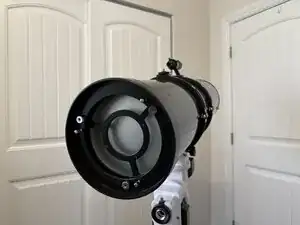
Take the telescope lens cap off to reveal the secondary and primary mirror on the inside of the telescope.
-
-
-
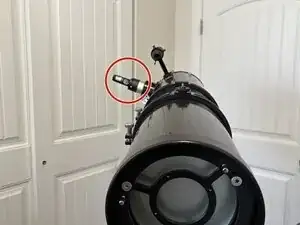
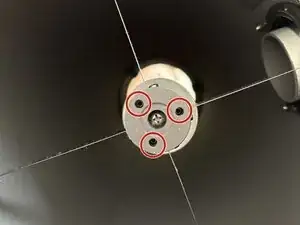
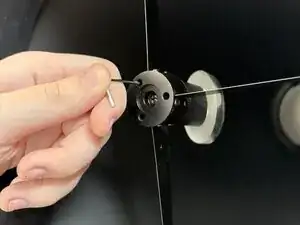
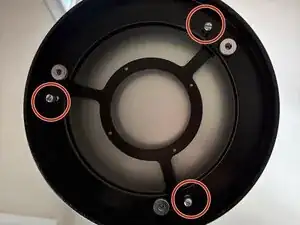
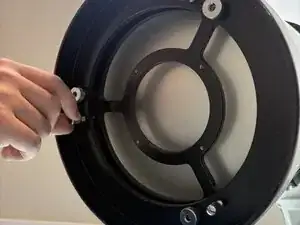
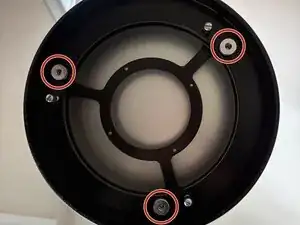
Use a 2 mm Allen key to loosen the three small screws on the back of the supporting columns for the secondary mirror.
-
-
-
To correctly position the secondary mirror, carefully tighten and/or loosen each Allen head screw one at a time, watching which way the mirror moves with each adjustment.
-
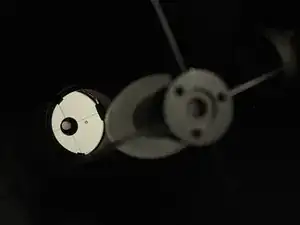
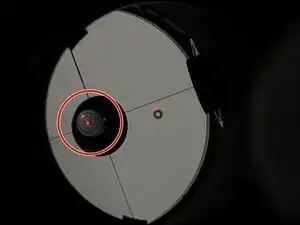
Looking past the supporting columns to the back primary mirror, slowly adjust each screw until the red dot on the telescope's primary mirror is in the center of the target as pictured.
-
Once the laser is properly aligned, tighten the Allen head screws evenly to secure the mirror in the correct position.
-
-
-
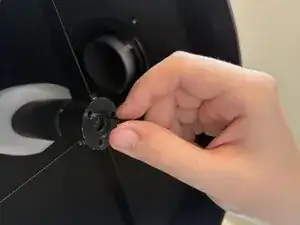
To re-position the primary mirror, lightly loosen each of the skinny silver knobs on the back end of the telescope to loosen the inside mirror.
-
-
-
Turn each of the flat sliver knobs to rotate the primary mirror's position inside the telescope.
-
While looking at the collimator target, slowly adjust each knob one at a time until the red dot is in the center of the collimator's target as pictured.
-
Re-tighten the three skinny silver knobs on the back end of the telescope to lock the primary mirror into place.
-


When all steps are complete, the laser collimator can be removed and all lens caps can be replaced.
To avoid the need for frequent collimations, keep the telescope in a temperate environment as humidity can cause the mirrors to shift positions and impact the quality of the telescope's images.