Introduction
If your Summer LookOut Duo baby monitor is displaying broken images or no image at all, and your handheld unit is beeping, check out this troubleshooting guide. If that didn't help, then it may be your camera. If you've ruled out the display itself and have tried cleaning off your camera, then it could be the camera lens specifically. This step-by-step guide goes through how to replace the lens of baby monitor cameras.
Before proceeding, make sure the device is powered off and dry to avoid internal damage to the device. The lens is connected directly to the camera's motherboard, so this will avoid any potential shock hazards.
CHOKING HAZARD: This device contains small screws. If possible, use a magnetic mat or small container within eyesight to keep track of the screws to prevent possible ingestion or misplacement.
Tools
-
-
Remove the plastic wall mount attached to the base of the stand.
-
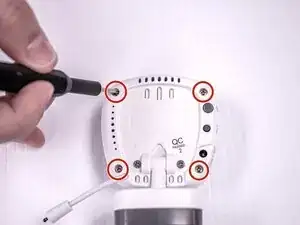
Remove the four 9 mm screws on the back four corners of the camera using a Phillips #00 screwdriver.
-
-
-
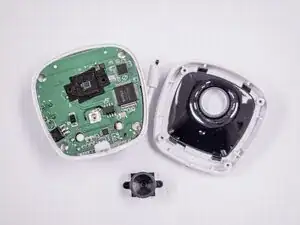
Gently remove the front casing.
-
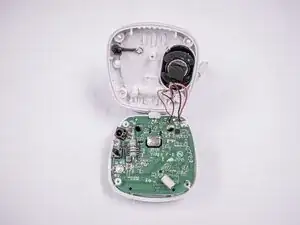
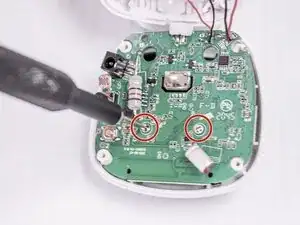
Remove the two 5 mm screws near the upper center on the back of the motherboard using a Phillips #00 screwdriver.
-
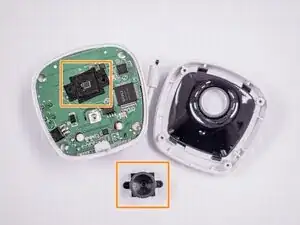
The old camera lens will fall off after the screws are removed.
-
Replace the new lens.
-
To reassemble your device, follow these instructions in reverse order.