I will start by describing my config, versions and other stuff about all of the softwares I use.
Appcelerator Titanium Mobile SDK - 9.2.0
Appcelerator CLI - 8.0.0
XCode 11.3.1
Mac OSX Mojave - 10.14.6
OpenCV - 4.4.0
From the very beginning, I've downloaded the SDK 9.2.0 from the link above, and installed it (pasted the contents of the zip file) on the following directory:
/Users/yourUserName/Library/Application Support/Titanium/mobilesdk/osx/
The contents of the modules folder, I pasted on:
/Users/yourUserName/Library/Application Support/Titanium/modules
Now, we need to create a new Appcelerator's Module with iOS as deployment target.

After the module's creation (I will assume the module's name as opencvtest), open the opencvtest.xcodeproj, located on:
yourPathToWorkspace/Appcelerator_Workspace/moduleName/ios/
Now, Let's start configuring the module to receive the OpenCV Framework.
To begin with, go to the ComOpencvTest_Prefix.pch and use this code:
 #ifdef __cplusplus
     #import <opencv2/opencv.hpp>
 #endif

 #ifdef __OBJC__
     #import <Foundation/Foundation.h>
     #import <UIKit/UIKit.h>
 #endif
The __cplusplus parts, NEEDS to be placed BEFORE the __OBJC__, or else there is going to be some compiling errors (as stated on the OpenCV Tutorial).
- Now, we will physically copy the
opencv2.framework file, into the project's Framework folder, in XCode. (Just drag it from Finder to XCode).
DO NOT forget to select Copy Items if Needed.

The opencv2.framework file will be copied to the /ios folder of the project. We need to move it to the /ios/platform folder, otherwise the module will crash the App on the build.
- Now, we need to add some other frameworks that OpenCV needs in order to work (again, as stated on the OpenCV Tutorial mentioned above).
To do that, we need to click on the Project's name on XCode, then select Build Phases and expand Link Binary with Libraries. Click on the + icon and select the following list of Frameworks, then add it to the project. It will be like this:
- Proceeding, we will need to configure some stuff. First, click on
Build Settings and search for Other Linker Flags. Then, open the list and add -lzto it.
We also need to configure Library Search Paths and Framework Search Paths.
Here is what you should put in each one:

Lastly, we need to create an User-defined build setting. This step I found on StackOverflow due to some errors I was facing. This is another workaround for the step 9. I got this config from this answer. Continuing, create the setting by clicking on the + and selecting Add User-Defined Setting.

For it's description and value, use: LD_VERIFY_BITCODE, and NO.

- OpenCV uses
Objective-C++ So, in order to use the framework in your project, the Classes that will make use of it, needs to be .mm and not .m (this tells the compiler to read your code correctly), so rename it like this:
- Now, for some unknown reason, we must create a
.swift file and it's bridging-header.h file. I learned this after trying to compile the module and get the error: ld: warning: Could not find auto-linked framework 'swiftCore'. A lot of people talk about this error on StackOverflow, and one of the most common answers as a workaround is to just create the swift file with the bridging header. So, let's do this.
Right click the Project's name and select New File.
Then, select Swift file.
Select the Classes folder as the destination of the .swift file. The rest leave as it is.
XCode will then, ask to create a Bridging Header file. Do it.
- In this step, we will compile the module. To do so, open
Terminal application and go to the Module's /ios folder.
And then, enter the following command: appc run -p ios --build-only.
With the module built, we need to open Finder and go to the dist module's directory.
/Users/yourUserName/Document/Appcelerator_Workspace/opencvtest/ios/dist/
Unzip the file inside, which is the module itself.
- Now, we can use the examples on
ComOpencvTestModule.mm to call in Appcelerator Studio, to test things.
These are the examples:
- (NSString *)example:(id)args
{
    // Example method.
    // Call with "MyModule.example(args)"
    return @"hello world";
}

- (NSString *)exampleProp
{
   // Example property getter.
   // Call with "MyModule.exampleProp" or "MyModule.getExampleProp()"
   return @"Titanium rocks!";
}

- (void)setExampleProp:(id)value
{
   // Example property setter.
  // Call with "MyModule.exampleProp = 'newValue'" or "MyModule.setExampleProp('newValue')"
}
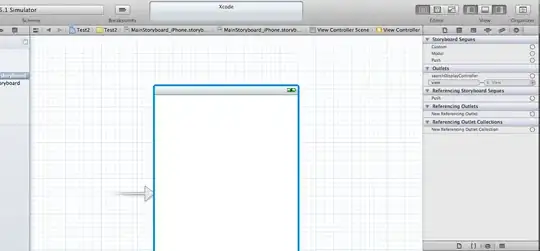
So, in Appcelerator Studio create a new Mobile App Project.
I selected Classic (Not Alloy), and Default Project, and used the configuration bellow:
Remember the .zip file from step 10? Get the unzipped folder it creates called modules and paste it on your Project's App root directory. Like this:

Now, open the tiapp.xml file from the App's project. On the Module part, click on the + button and link your module to the App.
Now we are finally ready to go!
To test it in a very, very simple way, I cleaned all of the contents of the app.js file and did this:
var appWindow = Ti.UI.createWindow({});
var opencvTest = require('com.opencv.test'); //you must use a variable that requires your module.

opencvTest.example(); //now we use that variable to call for the module's  methods.
opencvTest.getExampleProp();

appWindow.open();
Finally, build the App on a device or simulator, your choice. For testing, I ran it on simulator.
After the build, you should have a hello world and a Titanium rocks! log response.
All of this seems very simple, but as I said, I struggled a lot to come to this simple steps. So, this answer is to help people like me! =)


