Unfortunately, it is not possible to select all the tables at once with some neat shortcut. Fortunately, even a beginner can use a simple macro and the job is complete in minutes.
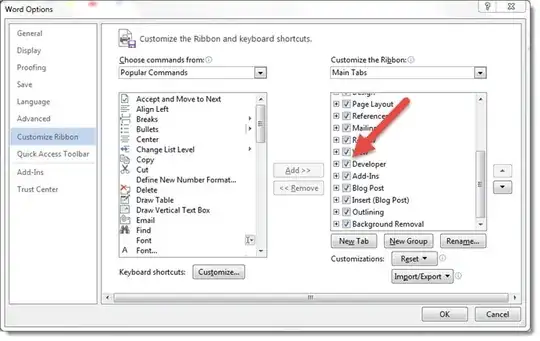
For Word 2010 onwards, the 'Developer' tab should already be shown by default, but if not, it is accessed via its the integral ribbon editor. In these applications the ribbon editor is available from File > Options > Customize Ribbon. Tick the Developer checkbox.
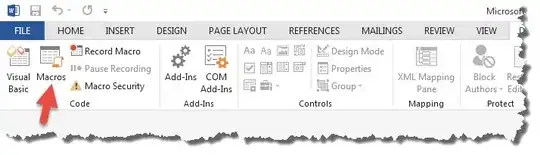
Once this is done, click the Developer tab > Macros button
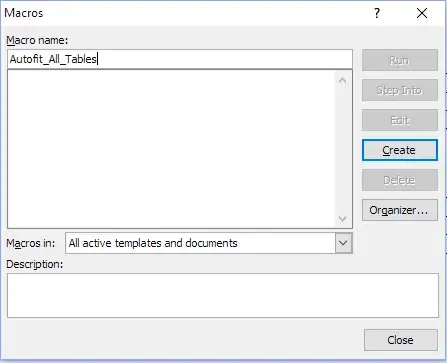
In the new window, type in "Autofit_All_Tables" in the textbox shown, then click the Create button to create a new macro.
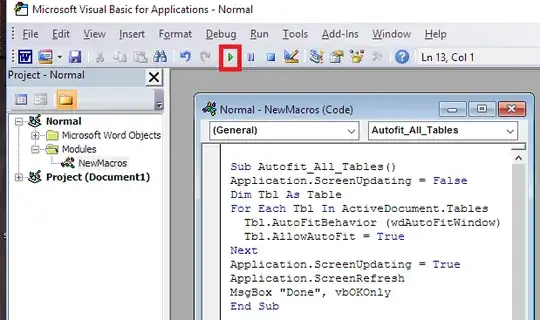
Paste the following code into the white text area, fully replacing the existing code.
Sub Autofit_All_Tables()
Application.ScreenUpdating = False
Dim Tbl As Table
For Each Tbl In ActiveDocument.Tables
  Tbl.AutoFitBehavior (wdAutoFitWindow)
  Tbl.AllowAutoFit = True
Next
Application.ScreenUpdating = True
Application.ScreenRefresh
MsgBox "Done", vbOKOnly
End Sub
Then click the green Run arrow (located in the red box in the image).
You should get a little window that says "Done". Close the VBA developer window and sit back in your chair looking pleased with yourself.
Note: If you want to set the width to a percentage fraction of the width between the margins, then create a macro called "Set_Global_Table_Width" and paste in the following code instead. Here the width is set to 100 (i.e. 100%), but you can change it to whatever percentage you want after pasting it into the Word VBA Developer Macro box shown above.
Sub Set_Global_Table_Width()
Dim pT As Word.Table
For Each pT In ActiveDocument.Tables
 pT.PreferredWidthType = wdPreferredWidthPercent
 pT.PreferredWidth = 100
Next
MsgBox "Done"
End Sub


