I don't have an examples specifically for Ubuntu, but I'm guessing the prefs are going to be similar to how they are on Mac - Windows appears to have a simple on/off switch, Mac doesn't.
From VLC - Documentation:Subtitles
Subtitles are enabled by default in VLC media player. To disable them,
go to the Video menu, and to Subtitles track. All available subtitles
tracks will be listed. Select "Disable" to turn off the subtitles.
Depending on the media, a description (language, for example) might be
available for the track.
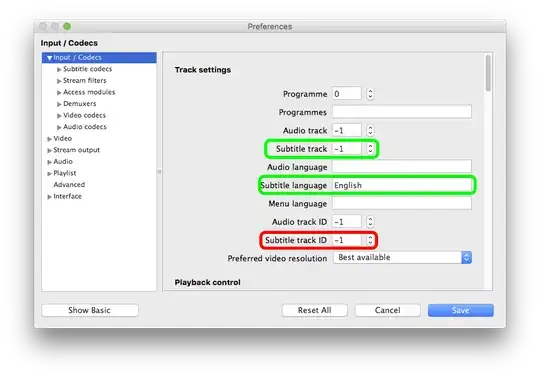
To disable subtitles by default, select "Preferences", then "Show
All". Select "Input/Codecs". On the "Subtitle Track ID" selection
window, change the value to "-1". (NOTE: Changing the value in the
"Subtitle Track" menu will not disable the subtitle file.) In the case
of multiple subtitle tracks, a value of "0" will enable subtitle track
1, a value of "1" will enable subtitle track 2, and so on.
However, this doesn't seem to work in practise.
Setting the 'Subtitle track ID' to anything other than -1 seems to disable it entirely.
After some testing, I discovered the 'Subtitle track' can be set to -1 to find the first available track, or >=0 to find a numbered track.
Setting 'Subtitle track' to -1 in combination with a specified language in the 'Subtitle language' field would find the correct language, whatever track number it is.
On Mac, switch to the full prefs - Show All at the bottom of the Basic Prefs panel.
This is the setting I used to get it to find English every time & play automatically.
As an aside - the default key to cycle round subtitle languages is V [which will also disable at the end of the queue before cycling round again], or Shift/S to just switch on/off.
