How can I convert a video file to a sequence of images, for example one frame every N seconds. Can mplayer or ffmpeg do this? I have used MPlayer to grab screenshots manually but I would like to automate this for a long video.
Asked
Active
Viewed 2.6e+01k times
8 Answers
130
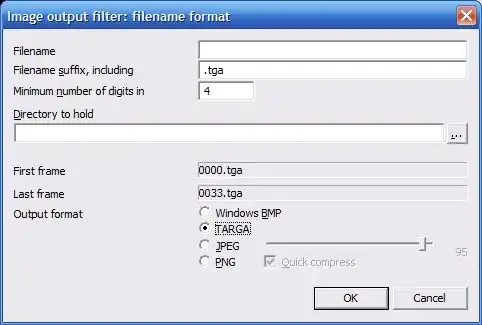
It's very simple with ffmpeg, and it can output one frame every N seconds without extra scripting. To export as an image sequence just use myimage_%04d.png or similar as the output. The %0xd bit is converted to a zero-padded integer x digits long - the example I gave gets output as
myimage_0000.png,myimage_0001.png,myimage_0002.pngetc..
You can use lots of still image formats, png, jpeg, tga, whatever (see ffmpeg -formats for a full list).
Ok so now we know how to export the movie as a sequence of images, but say we don't want to export every single frame?
The trick is to simply change the frame rate of the output to whatever we want using the -r n option where n is the number of frames per second. 1 frame per second would be -r 1, one frame every four seconds would be -r 0.25, one frame every ten seconds would be -r 0.1 and so on.
So to put it all together, this is how it would look to save one frame of input.mov every four seconds to output_0000.png, output_0001.png etc.:
ffmpeg -i input.mov -r 0.25 output_%04d.png
Note that the -r 0.25 option goes after the -i input.mov part, because it's controlling the frame rate of the output. If you put it before the input it would treat the input file as if it had the specified frame rate.
Change the %xd to however many digits you need, e.g. if the command would create more than 10,000 frames change the %04d to %05d. This also works for input files that are image sequence. Read more here.
Windows users:
On the command line use %
example: ffmpeg -i inputFile.mp4 -r 1 outputFile_%02d.png
In CMD and BAT Scripts use %%
example: ffmpeg -i inputFile.mp4 -r 1 outputFile %%02d.png
So double %% in scripts, and single % on the interactive command line. Getting it wrong in either situation will generate an error.
Edit Worth checking out the discussion of file types in the comments below. There are advantages and disadvantages with each:
- jpeg much smaller file sizes, lossy, only 8-bit colour, no alpha.
- png lossless, large files, slow. 8-bit colour supports alpha.
- tiff lossless, even larger files, fast, supports up to 16 colour and alpha.
To specify the file format, just use the required extension in the output file, e.g. myimage_%04d.jpg, myimage_%04d.png or myimage_%04d.tiff
stib
- 4,389
36
mplayer -vo jpeg -sstep 5 file.avi
will save a frame as a jpeg file every 5 seconds.
However, it will not stop at the end of the file, it will continue producing copies of the last frame. To avoid this, find the duration of the video in seconds, using another player, or with mplayer:
mplayer -vo null -ao null -frames 0 -identify file.avi
and look for a line like "ID_LENGTH=147.00".
Subtract 2 from the length, and use this value for the -endposoption. For example, for a 147 second video:
mplayer -vo jpeg -sstep 5 -endpos 145 file.avi
Liam
- 3,150
19
With ffmpeg, you can do the following:
ffmpeg -ss 4 -i input.avi -s 320x240 -frames:v 1 output.jpg
This command generates a 320×240 sized JPG thumbnail at the 4th second in the video. Put this in a script that changes the time and file name and you're done.
More info: Create a thumbnail image every X seconds of the video
9
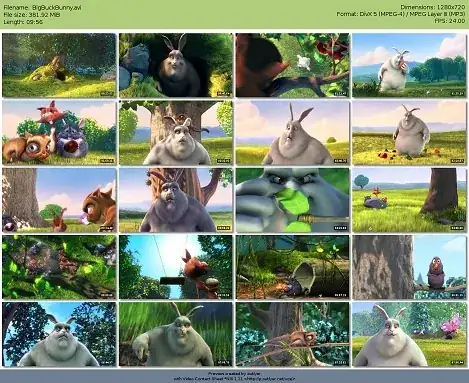
If you are after a kind of contact sheet and if you are working with a Unix-like OS, you can use this elaborate script, called to the point Video Contact Sheet *NIX, short vcs.
In the background it also uses ffmpeg (by default) or mplayer, hence can handle a lot of video formats. It automates the process of capturing still images from the movie and compose these to an image with some header and footer. You can choose e.g. how many captures you want or alternatively the time differences between them.
For a interval of 10 minutes, the invocation is like that:
vcs -i 10m input.avi
Check the full list of commandline options for some other tweaks.
Here is an example contact sheet, taken from the homepage:
7
With VLC 1.1.0 and above, you can use the scene video filter:
vlc C:\video\to\process.mp4 --rate=1 --video-filter=scene --vout=dummy --start-time=10 --stop-time=11 --scene-format=png --scene-ratio=24 --scene-prefix=snap --scene-path=C:\path\for\snapshots\ vlc://quit
The above saves 1 out of every 24 frames (--scene-ratio=24), starting at 00:00:10 and ending at 00:00:11.
Just tested and confirmed this works with VLC 2.0.3 on a fresh Windows 8 installation (I have no additional video plugins or software).
Full documentation: http://wiki.videolan.org/How_to_create_thumbnails
Michael
- 1,743
1
You could also try this
from the VLC command line...
vlc "C:\YOUR\file\path\file.avi" -V image --image-out-prefix=capname --image-out-ratio=60
file.avi is the video you want to capture from, capname is the prefix of the saved images, you might want to play around with the ratio (60 means that 1 out of 60 images is captured) You can add more commands, for example --image-out-format jpeg will save your caps as jpegs instead of of pngs, --snapshot-path lets you choose where to save your caps.
Nifle
- 34,998
1
You can skip frames in VirtualDub. Just use "Decimate By" option located at Video -> Frame Rate menu. For example if you set "Decimate By 100" then use File -> Export -> Image sequence, it will save only every 100th frame.
Alex
- 11