How to download a YouTube (or any other streaming service, period) live stream (via screen capture)
OBS Studio works great for this. Here are instructions for general installation and setup for OBS Studio, including configuring video and audio sources and doing screen recording and audio capture.
- Install it. It is cross-platform (Windows, Mac, and Linux), and very high quality and very well-supported, with excellent installation instructions. Go here for the installation links: https://obsproject.com/.
- It is also free and open source, and no-cost (NOT the same thing), both of which are awesome.
- Source code: https://github.com/obsproject/obs-studio
- License is GPL v2.0: https://github.com/obsproject/obs-studio/blob/master/COPYING
- I'm on Linux Ubuntu 18.04 and 20.04, so I used the Ubuntu instructions here: https://obsproject.com/wiki/install-instructions#linux. At the time of this writing, they were:
sudo apt install ffmpeg
sudo apt install v4l2loopback-dkms
sudo add-apt-repository ppa:obsproject/obs-studio
sudo apt update
sudo apt install obs-studio
- Next, I followed these instructions here, by Kezz Bracey from 25 Jul 2020: https://photography.tutsplus.com/tutorials/obs-for-screen-recording-quick-start--cms-28549. Let me summarize them, plus add some of my own steps, as follows:
- Open it. The first time you open it, it will ask if you'd like to optimize for streaming or just recording. Most people will want to choose the option for just recording. If you do live streaming to an audience too, choose that option instead.
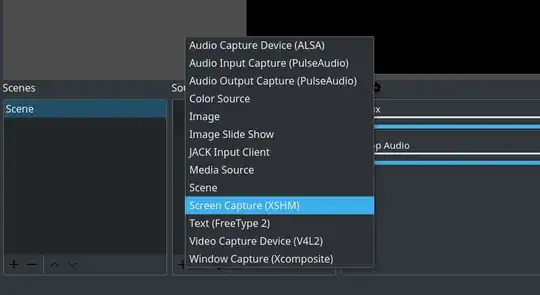
- Now, at the bottom of the OBS main window, under "Sources", you'll see it's empty. Click the + icon to add a new video source. Choose "Screen Capture (XSHM)", as shown here (these images borrowed from Kezz Bracey's instructions above):
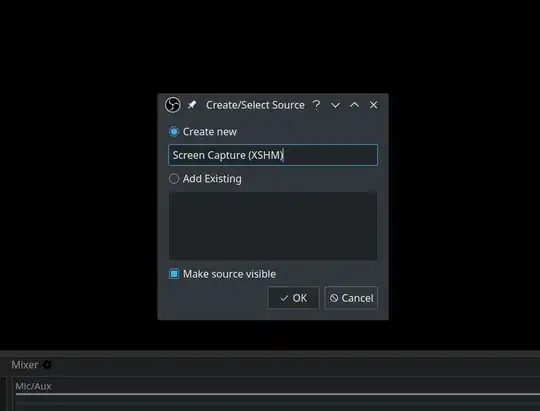
Click "OK":
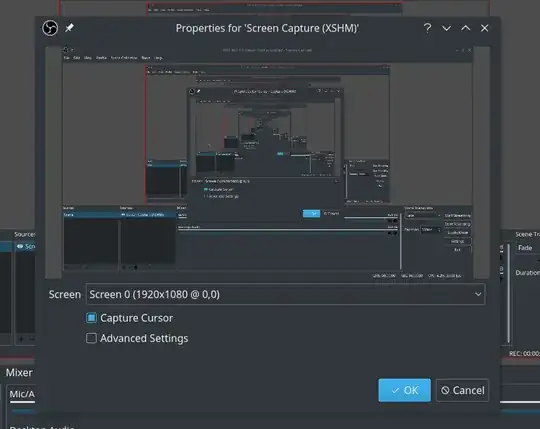
Click "OK" again:
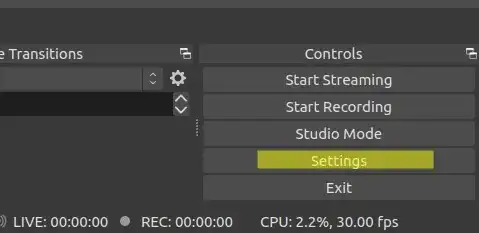
- Click "Settings" in the bottom-right:
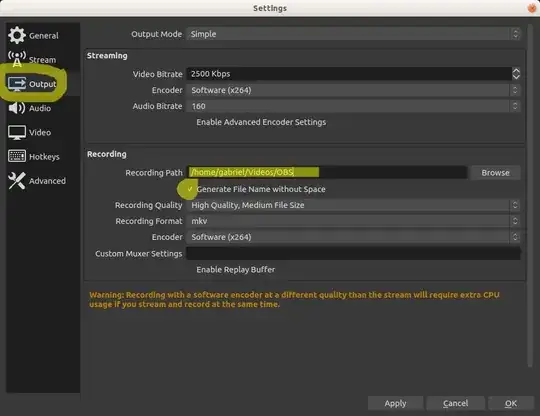
Click "Output" in the left-hand pane --> set or make note of your "Recording Path" (I like to set mine to home/USERNAME/Videos/OBS) --> optionally check the box for "Generate File Name without space" (I do this) --> click "OK."
- Back to the main screen, at the bottom, under "Audio Mixer" section, you should see "Desktop Audio", which is any audio playing from inside your computer, and "Mic/Aux", which is any ambient audio being picked up by your computer's microphone or Aux jack. Normally, for making video tutorials and things, you'll want to leave both of these audio sources ON so you can talk through your video and explain what you're doing while you're doing it, and it will record sounds cleanly coming from the computer too via the "Desktop Audio" source.
- In the event you were listening to peaceful zen music coming out of your computer through headphones while you spoke, however, you'd want "Desktop Audio" OFF, so only you hear it, not the recording, or, in the event you are recording a YouTube or other livestream, you'd want "Mic/Aux" OFF so you don't add ambient noise to the recording--you only get the video audio instead.
- So, click the speaker icon to turn OFF the Mic/Aux audio input, as shown here. It will now show a red icon with an X, indicating it is OFF:

- Click the "Start Recording" button at the right of this bottom pane. Now, open up your YouTube live stream, make it full screen, and voila! You're recording it live, via screen capture for video and "Desktop Audio" capture for audio.
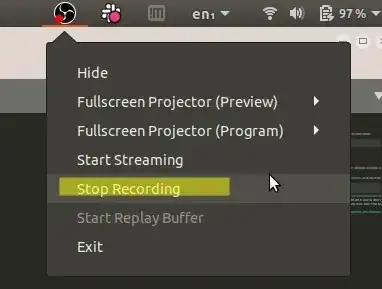
- When done, click the "Stop Recording" button (where "Start Recording" use to be), or click the OBS studio icon at the top-right of your computer (for Ubuntu at least), and choose "Stop Recording":
- Navigate to your "Recording Path" you set above, and voilá! There is your video recording!
Mute output audio while doing live recordings
If you want to record a live video while not hearing its audio in your computer's speakers, just plug in a stereo audio splitter (best so you don't hear anything), or pair of headphones or broken headphones. It's crude, but I don't know any other way. Messing with your Ubuntu audio settings may trigger unusual side-effects, such as the microphone input getting recorded even when the microphone is muted in the "Audio Mixer" at the bottom of OBS Studio.
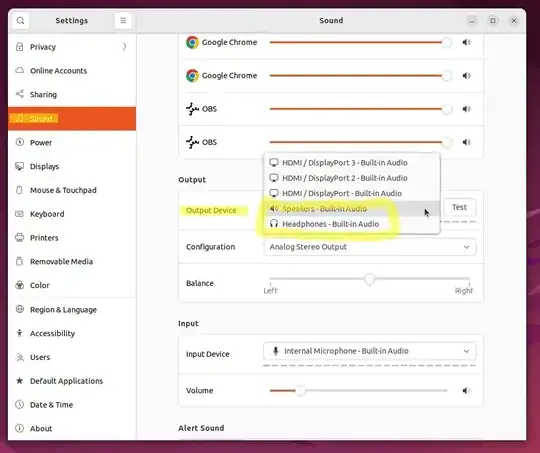
Once you have plugged in a 3.5mm stereo audio splitter, for instance, an Ubuntu system pop-up comes up. Choose "headphones" for the output device. This populates a new entry into your Ubuntu System "Sounds" settings "Output" section. To rapidly toggle between hearing and not hearing the audio output while OBS is recording live, simply choose Speakers to hear it vs Heaphones to not hear it, again, as selected in your Ubuntu system "Sound" settings shown below. This allows you to record a video on one monitor, for instance, without being distracted by its live audio, while working on another monitor.