23

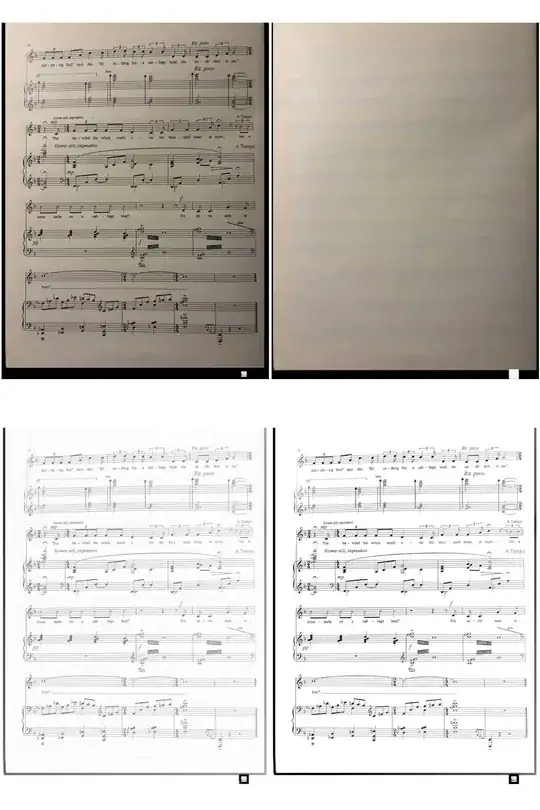
I use Linux, and sometimes I need to make a document printable when it was photographed in a very imperfect way. A page from a rather complicated example that I recently needed to handle is this one:

enter image description here

Usually, playing with levels or curves produces workable output. But not in this one, because different parts have very different light/darkness. So either I lose some of the line image (score) on the top left, or else the bottom right has some darkness on the background, which makes the score hard to read when printed on a laser printer.

This particular image was successfully fixed by onlinecamscanner.com - but (a) there is no fine-tuning there so it does not work on everything, (b) it's rather awkward to use, especially its crop stage, (c) what if this service goes away?

So, I'd like some way to have an effect like that on my Linux machine. An effect that preserves the image (which is all dark lines) but makes the background white. Ideally more tunable than what is on that website. Where can I get this?

Giacomo1968
  • 58,727

6 Answers6

28

I use ImageMagick for this. It occurs often enough for me1 that I wrote a simple script called flatten_image:

#!/bin/bash

Use ImageMagick to improve badly lit, low contrast photos of line drawings

and text.

Usage: flatten_image <input image> <output image>

convert $1 ( +clone -blur 30x30 -negate ) -compose Plus -composite -normalize $2

It basically performs a high-pass filter by subtracting a low-pass filtered version of the image from the original, and then contrast-stretching the result.

Without any tweaking, it does the following to your image. It works best if you crop away any high-contrast edges on the image.

flattened image


1 I should say "occurred". I used to be a moderator on EE.SE, and people kept uploading badly-lit pictures of their hand-drawn diagrams, and I created this script to quickly fix them.

23

In such cases, with gimp and a little bit of manual labor:

  • select the brightest WHITE spot, and apply levels and set white point to that white spot in the top left
  • after that, switch to quickmask, and make black-white gradient from that brightest white spot to the darkest white spot, and switch off quick mask
  • now, select the darkest WHITE spot, apply levels and set white point white spot in the bottom right
Ro-ee
  • 2,250
15

My approach is to approximate a clean background first, then use it to get uniform brightness

Steps of process

  1. Copy layer
  2. Apply a small radius (~1) Gaussian Blur filter
  3. Apply Dilate filter, big enough to hide all ink on the page
  4. Use Subtract or Divide blending mode, I don't have GIMP on hand, so use whichever looks right to you
  5. Now that image has a uniform brightness, merge layers and use levels or curves as usual

With some sane defaults you can automate this process in gimp or otherwise (ImageMagick, Python)

14

This is a very common task in computer vision: keyword thresholding.

If you would like to implement this yourself programmatically and are willing to get your hands dirty, OpenCV has functions for adaptive thresholding, which determines local thresholds for pixels instead of a single global value. Gaussian Thresholding uses a Gaussian kernel, meaning closest neighborhood values are weighted the most, with the weight of further values falling off exponentially. Another trick to reduce noise at the expense of sharpness is a tiny Gaussian blur, but you'll have to decide what amount of sharpness is needed.

adaptive thresholding

qwr
  • 1,005
7

This is a common issue with scanned or photographed documents. The image can be readily improved with image editing tools.

In the example below, I used free IrfanView, a small Windows application that runs well under wine in Linux, but powerful, free GIMP which you've installed can perform that task, too. GIMP, being so powerful, is also complex and has a longer learning curve.

Edited score

This quick edit used just a few features, and certainly can be improved. Though the directions include IrfanView shortcuts, the same tools can be found in GIMP.

  • Open the file in the image editor.
  • Open the dialog(s) to adjust the following, and edit as needed. [In IrfanView, press ShiftG.]
    • Contrast
    • Gamma
    • Brightness
  • Likely, the image will print better if it is made monochrome (i.e., grayscale), and if the number of colors (shades of gray) is reduced. [In IrfanView, press CtrlG to make grayscale, and menu item Image | Decrease color depth for that dialog.]

Other ways to improve the image involve use of tools to rotate and flatten the image, e.g., Perspective Transformations .8bf extension for Adobe and IrfanView.

0

You can also do that in Imagemagick with division normalization.

[![magick music.webp \( +clone -blur 0x13 \) +swap -compose divide -composite music.png][1]][1]

enter image description here

fmw42
  • 201
  • 2
  • 6