Software Needed
The idea, that there exists software somewhere on the internal drive that can be used to restore to factory conditions, is probably not true. Instead, Dell provides a tool called Dell SupportAssist OS Recovery. The user's guide can be found here. Basically, the Dell computer boots to Dell SupportAssist OS Recovery, which runs entirely in a ram drive. You can use Dell SupportAssist OS Recovery to reset the computer to factory conditions. Dell SupportAssist OS Recovery can download the Microsoft Windows which originally came with the computer from Dell servers.
I was able to boot Dell SupportAssist OS Recovery from a flash drive. Note, this was for a Dell XPS 13 9305 and the OP has a Dell Precision 5490. I was greeted by a walkthrough of the options available. One screenshot of this walkthrough is shown below.
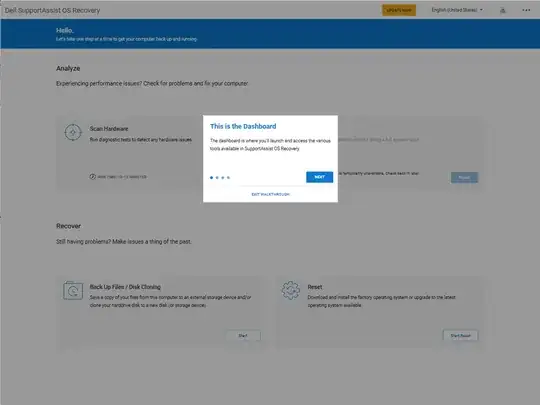
In the lower right of the above image, you can see a "Start Reset" button which can be selected to "Download and install the factory operating system". The next section provides instructions on how to proceed.
Reset your computer to factory state†
Prerequisites
Your computer must be connected to a power outlet.
About this task
You can use the Reset to factory settings option to reset your operating system and default applications to the state they were in when your computer was shipped from the Dell factory.
Steps
On the SupportAssist OS Recovery home page, click START RESET on the RESET tile.
System reset options are displayed.
Select Reset to factory settings, and then click NEXT.
The option to back up your files is displayed.
- If you want to back up your files, select Yes, back up my files, click NEXT, and follow the instructions in Back up files section to back up the required files.
- If you have already created a backup of your files or you do not want to back up your files, select No, do not back up my files and click NEXT.
Read the warning message that is displayed, and click YES, CONTINUE.
On the Confirm your reset page, perform the following steps:
- Optionally, from the Select reason list, select a reason for resetting your computer.
- Select the I understand that the reset will delete all of my system data and personal files check box, and then click NEXT.
The factory reset process begins and may take several minutes to complete.
After the process is complete, click RESTART to restart your computer.
Next steps
Reinstall all the applications (including third-party applications) that were not originally installed on your computer. You can restore your files after resetting your computer to factory state. See Restore data after resetting your computer to factory state.
† The above instructions were copied from the Reset your computer to factory state section of the Dell SupportAssist OS Recovery User’s Guide.
Getting Dell SupportAssist OS Recovery
Dell offers many ways to get Dell SupportAssist OS Recovery. Below are some of these ways. I do not have a Dell computer, so I cannot fully test what I am posted. If errors are found, make corrections by either editing this answer and or posting a comment.
Access from the Control Panel
Steps*
- In the search box on the taskbar, type control panel, and then select Control Panel.
- Select System and Security.
- Double-click SupportAssist OS Recovery.
* The above instructions were copied from the Run System Repair section of the Dell SupportAssist OS Recovery User’s Guide.
Boot the Dell SupportAssist OS Recovery Stored in the Computer Firmware
Steps‡
Turn on or restart your PC.
Press F12 to access the one time boot menu.
| Note |
| If you wait too long and the operating system logo is displayed, wait until you see the Windows desktop, restart your PC, and try again. |
The available boot options are displayed.
Select the SupportAssist OS Recovery option from the boot menu, and then press Enter.
The SupportAssist OS Recovery Image Download page is displayed.
Connect to any available wired or wireless network. For instructions to connect to wireless networks, see Connect to
wireless networks.
Click Start Recovery.
The download begins and may take several minutes to complete.
Results
When the download is complete, the SupportAssist OS Recovery home page is displayed.
‡ The above instructions were copied from the Start SupportAssist OS Recovery using BIOSConnect section of the Dell SupportAssist OS Recovery User’s Guide.
Use Another Computer Running Windows to Create a Bootable Dell SupportAssist OS Recovery Flash Drive.
The computer could be physical or running in a virtual machine.
Dell provides downloadable software that can create a bootable Dell SupportAssist OS Recovery flash drive.
The basic steps are given below.
- Find a computer or a virtual machine running Windows.
- Download and install the "Dell OS Recovery Tool" application.
- Use the "Dell OS Recovery Tool" application to write then Dell SupportAssist OS Recovery software to a flash drive.
A more detailed explanation is given below.
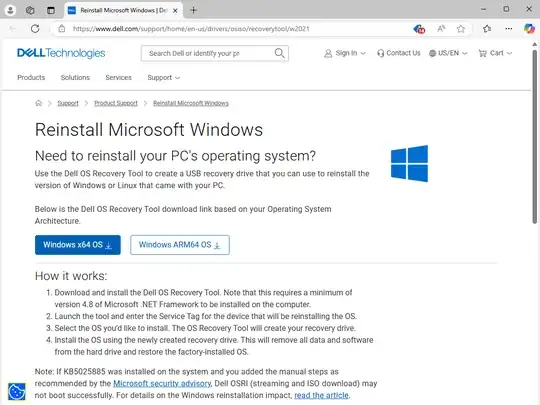
Dell Technologies has a website Reinstall Microsoft Windows, where you can download the software to create recovery media on a 16 GB or larger flash drive.
I chose the download for "Windows x64 OS". The file Dell-OS-Recovery-Tool_NV509_WIN64_2.4.1.2181_A00.exe was downloaded to a computer running the latest Windows 11 Home. If you have a working Windows on your Dell, then you can do this or use a different computer running Windows. I ran the downloaded application, which installed the "Dell OS Recovery Tool" application. Opening the application produced the following window.
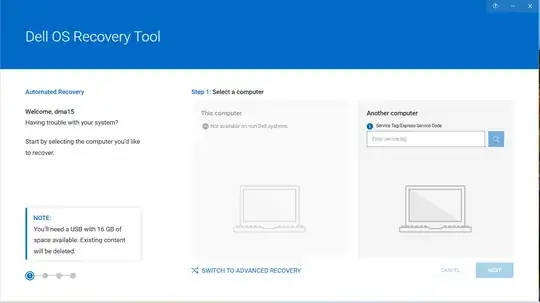
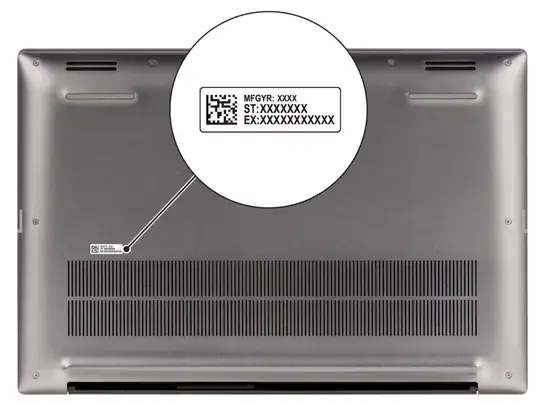
You will need to enter the computer Service Tag or Express Service Code for your Dell computer. Below is the location on your computer where both can be found.
I do not have either the Service Tag or Express Service Code for your Dell computer. So, to proceed, I hunted the internet for any valid value. I found the Express Service Code for a Dell XPS 13 9305, so I will proceed using this. At this point your results will probably differ from mine.
I decided to try Avanced Recovery, entered the code and arrived at the following window. Here, I would assume you would get Windows 11 options instead.
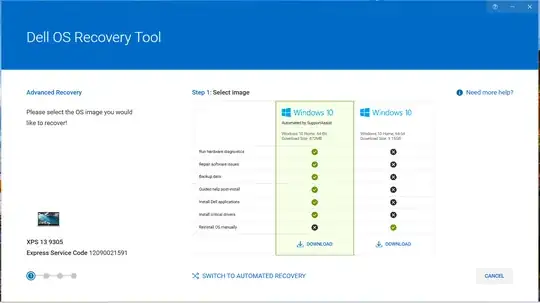
I chose to download "Automated by SupportAssist". The following window was displayed.

I inserted a flash drive and selected the USB drive. After checking of the "I understand ..." box, I selected "Download". When the software finished writing to the flash drive, the follow window appeared.
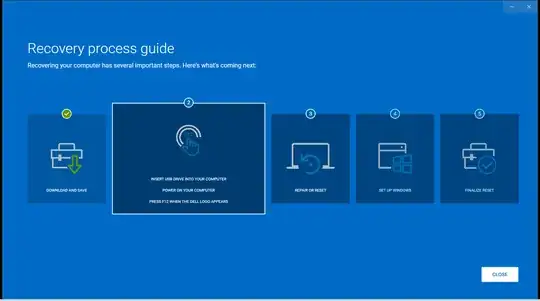
I selected "Close" and the application closed.


