The section below titled "My Way of Installing the Triple Boot" describes the steps for installing which avoids the warning message posted in your question. Basically, Grub is updated before the partition causing the warning message is created.
In both your question and posted answer, you are trying to install a BIOS booting OpenBSD to a GPT drive. This results in the OpenBSD installer terminating before completing the installation. My answer avoids this by hybrid partitioning the drive before installing OpenBSD. Afterwards the hybrid partitioning can be left in place or removed.
| Note |
| Before answering this question, I assumed only Windows could be installed to BIOS boot on a hybrid partitioned drive. OpenBSD can BIOS boot on MBR partition table, GPT and hybrid partitioned drives. |
When updating grub after installing OpenBSD, The following message appears multiple times where X is positive integer. This is a warning message which can be ignored.
warning: Discarding improperly nested partition (hostdisk//dev/sda,gpt5,bsdX).
Below are two Bash scripts that can be used to keep this message from appearing.
The following script filters out the warning message.
#!/usr/bin/bash
/usr/sbin/update-grub |& grep -v "warning: Discarding improperly nested partition (hostdisk//dev/sda,gpt5,bsd"
The following script temporarily sets the offending partition type to zero.
#!/usr/bin/bash
if [[ "$USER" != root ]]; then
    echo "$0: You must run this as root"
    exit 1
fi
DEVICE=/dev/sda
PARTITION=5
TYPE="$(sfdisk --part-type $DEVICE $PARTITION)"
TYPE00=00000000-0000-0000-0000-000000000000
TYPEA6=824CC7A0-36A8-11E3-890A-952519AD3F61
if [[ "$TYPE" == "$TYPEA6" ]] then
    sfdisk --no-tell-kernel --part-type $DEVICE $PARTITION "$TYPE00"
    partprobe
fi
/usr/sbin/update-grub
STATUS=$?
if [[ "$TYPE" == "$TYPEA6" ]] then
    sfdisk --no-tell-kernel --part-type $DEVICE $PARTITION "$TYPEA6"
    partprobe
fi
exit $STATUS
The scripts should be stored in the /usr/local/sbin folder under the name update-grub. The owner:group should be root:root and the mode bits should be set to 0755. In other words, enter the commands below as the root user.
    chown root:root /usr/local/sbin/update-grub
    chmod 0755 /usr/local/sbin/update-grub
My Way of Installing the Triple Boot
Below are the instructions for installing a AnitX Linux, FreeBSD and OpenBSD triple boot on a SATA drive. The operating system need to be installed in the order given.
AntiX Linux
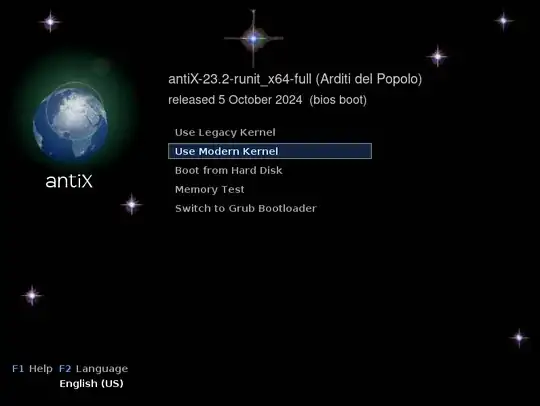
Boot from the AntiX Linux installation media. When an image similar to the one below appears, select "Use Modern Kernel".
When the desktop appears, open a Terminal Application window. Enter the following command be become the root user. You will need to enter the rest of the commands as the root user. Note: The password was demo.
sudo -s
Enter the command below to create a GPT and add the following partitions: BIOS boot partition, Linux filesystem and Microsoft basic data.
gdisk /dev/sda
The gdisk command is interactive. Enter the values in the first column of the table given below. Note: The commands are case independent.
| Entry |
Default |
Type |
Comment |
o |
|
command |
Create a new empty GUID partition table (GPT). |
y |
|
parameter |
Do you want to proceed? |
n |
|
command |
Add a new partition. |
1 |
✅ |
parameter |
Partition number. |
2048 |
✅ |
parameter |
First sector. |
+1m |
|
parameter |
Set partition size 1 MiB. |
ef02 |
|
parameter |
Hex code for BIOS boot partition. |
n |
|
command |
Add a new partition. |
2 |
✅ |
parameter |
Partition number. |
4096 |
✅ |
parameter |
First sector. |
+18g |
|
parameter |
Set partition size 18 GiB. |
8300 |
✅ |
parameter |
Hex code for Linux filesystem. |
n |
|
command |
Add a new partition. |
3 |
✅ |
parameter |
Partition number. |
37752832 |
✅ |
parameter |
First sector. |
+235g |
|
parameter |
Set partition size 235 GiB. |
700 |
|
parameter |
Hex code for Microsoft basic data. |
p |
|
command |
Print the GPT. |
w |
|
command |
Write tables to disk and exit. |
y |
|
parameter |
Do you want to proceed? |
Enter the command below to format the third partition exFAT.
mkfs.exfat -L MyShared /dev/sda3
Close the Terminal application and open the Installer application. Proceed with the installation of AntiX Linux.
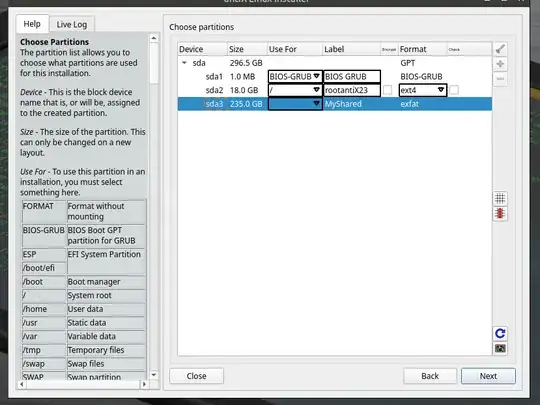
When an image similar to the one below appears, set "Use For" as shown below.
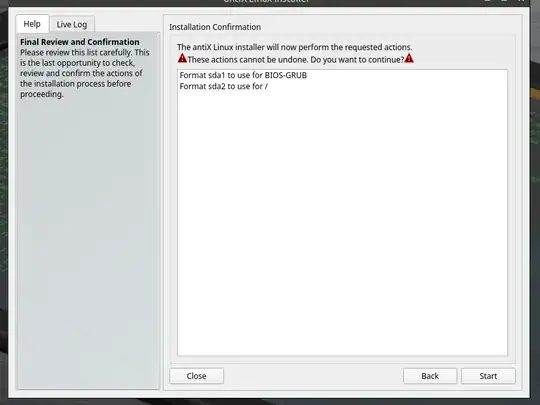
When an image similar to the one below appears, confirm the actions are the same before continuing.
When an image similar to the one below appears, change the size of the swap file if desired. When finished, select the "Next' button.
Proceed with the installation until completion.
FreeBSD
Boot to AntiX Linux and open a Terminal Application window. Enter the following command be become the root user. You will need to enter the rest of the commands as the root user.
sudo -s
As the root user, append the following to the end of the /etc/grub.d/40_custom file.
menuentry "FreeBSD" {
    set root=hd0,gpt4
    kfreebsd /boot/loader
}
Enter the command below to update Grub.
update-grub
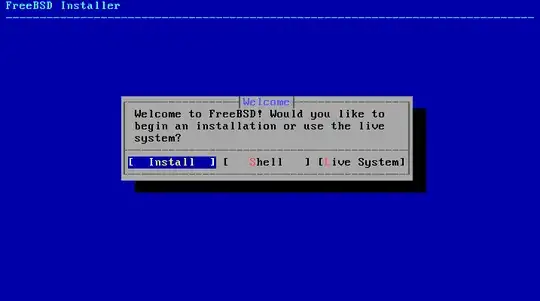
Boot from the FreeBSD installation media. When you see a image similar to below, select Install.
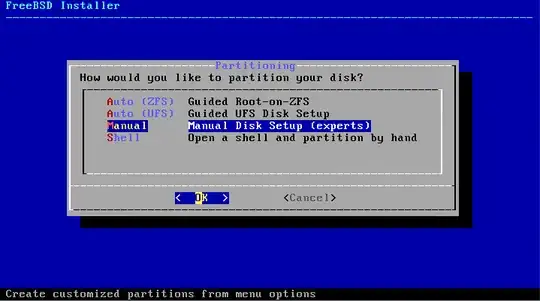
Proceed with the installation. When you see a image similar to below, select Manual, the OK.
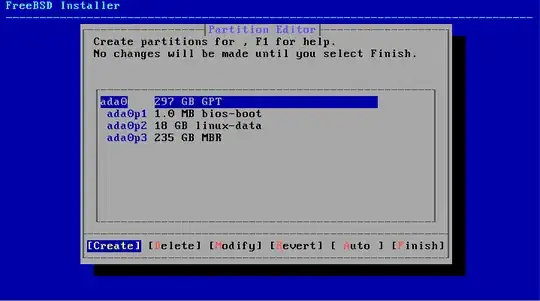
When you see a image similar to below, select Create.
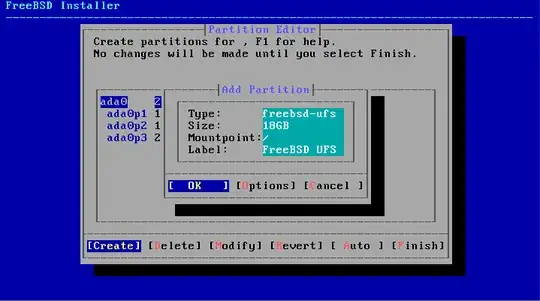
In the Add Partition popup shown below, set the size to 18GB, the mountpoint to / and the label to FreeBSD UFS, then select OK.
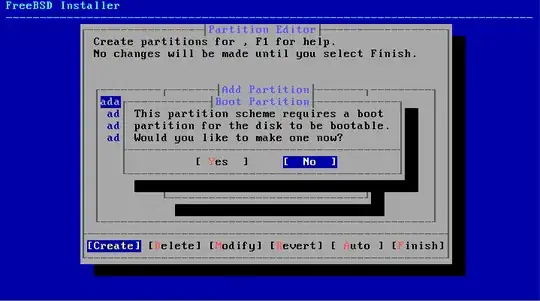
In the Boot Partition popup shown below, select No.
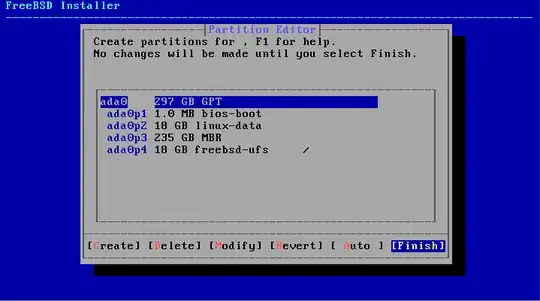
When you see a image similar to below, select Finish.
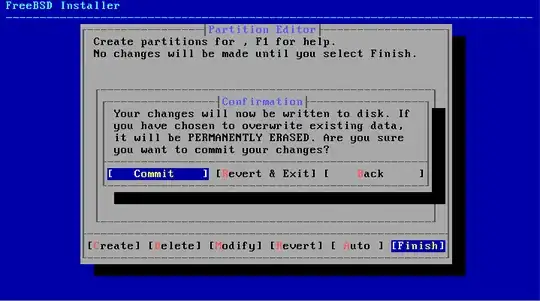
In the Confirmation popup shown below, select Commit.
Proceed with the installation.
| Note |
When adding users, there will be the following question.
Invite <new user> into other groups? []:
If you want the su command to work for the new user, then enter the group wheel. |
After you have finished installing and have booted to the FreeBSD installation, enter the following commands as the root user. This will create a 3 GiB swap file.
dd if=/dev/zero of=/usr/swap0 bs=1M count=3072 status=progress
chmod 0600 /usr/swap0
Append the following line to the end of /etc/fstab. I did this by using the nano text edtior. To install this editor, enter the command pkg install nano.
md99 none swap sw,file=/usr/swap0,late 0 0
Swap space will be added on system startup. To add swap space immediately, enter the following command.
swapon -aL
Enter the following command to install software that will allow mounting of exFAT volumes.
pkg install fusefs-exfat
To get the software to execute at starup, append the following line to the end of /boot/loader.conf.
fusefs_load="YES"
Enter the following command to create the directory where the exFAT volume will be mounted.
mkdir -p /media/MyShared
Append the following line to the end of /etc/fstab.
/dev/ada0p3 /media/MyShared exfat rw,mountprog=/usr/local/sbin/mount.exfat 0 0
The exFAT volume will be mounted on system startup. To mount immediately, enter the following commands.
kldload fusefs
mount -a
OpenBSD
Boot to AntiX Linux and open a Terminal Application window. Enter the following command be become the root user. You will need to enter the rest of the commands as the root user.
sudo -s
As the root user, append the following to the end of the /etc/grub.d/40_custom file.
menuentry "OpenBSD" {
    set root=hd0,gpt5
    kopenbsd -r sd0a /bsd
}
Enter the command below to update Grub.
update-grub
Enter the command below to add a OpenBSD disklabel partition.
gdisk /dev/sda
| Note |
With a GPT partitioned disk, the installer will attempt to install an UEFI booting OpenBSD. To cause a BIOS booting installation, the gdisk command will be used to hybrid partition the drive. This will cause the installer to see the drive as only having a legacy MBR partition table. |
The gdisk command is interactive. Enter the values in the first column of the table given below. Note: The commands are case independent.
| Entry |
Default |
Type |
Comment |
n |
|
command |
Add a new partition. |
5 |
✅ |
parameter |
Partition number. |
| 568332288 |
✅ |
parameter |
First sector. |
| 621803519 |
✅ |
parameter |
Last sector. |
a600 |
|
parameter |
Hex code for OpenBSD disklabel. |
p |
|
command |
Print the GPT. |
r |
|
command |
Switch to recovery and transformation options menu. |
h |
|
command |
Make hybrid MBR. |
3 4 5 |
|
parameter |
GPT partition numbers. |
y |
|
parameter |
Place EFI GPT (0xEE) partition first in MBR? |
07 |
✅ |
parameter |
Hex code for 2nd primary MBR partition. |
n |
|
parameter |
Set boot flag for 2nd primary MBR partition? |
da |
|
parameter |
Hex code for 3rd primary MBR partition. |
n |
|
parameter |
Set boot flag for 3rd primary MBR partition? |
a6 |
✅ |
parameter |
Hex code for 4th primary MBR partition. |
y |
|
parameter |
Set boot flag for 4th primary MBR partition? |
o |
|
command |
Print the MBR partition table. |
w |
|
command |
Write tables to disk and exit. |
y |
|
parameter |
Do you want to proceed? |
Boot from the OpenBSD installation media. When you see text similar to below, enter i followed by the Enter key.
Welcome to the OpenBSD/amd64 7.7 installation program.
(I)nstall, (U)pgrade, (A)autoinstall or (S)hell?
When you see text similar to below, select the default OpenBSD by pressing the Enter key.
Use (W)hole disk MBR, whole disk (G)PT, (O)penBSD area or (E)dit? [OpenBSD]
When you see text similar to below, select the default a by pressing the Enter key.
Use (A)uto layout, (E)dit auto layout, or create (C)ustom layout? [a]
If you see text similar to below, enter yes followed by the Enter key.
Directory does not contain SHA256.sig. Continue without verification? [no]
After you have finished installing and have booted to the OpenBSD installation, enter the following commands as the root user. This will install the software needed to mount the exFAT volume.
pkg_add exfat-fuse
mkdir -p /media/MyShared
To mount the exFAT volume, enter the following commands.
disklabel -pm sd0
mount.exfat /dev/sd0i /media/MyShared
Remove the hybrid partitioning.
| Note |
| This step is optional. |
Boot to AntiX Linux and open a Terminal Application window. Enter the command below to remove the hybrid partitioning.
sudo gdisk /dev/sda
The gdisk command is interactive. Enter the values in the first column of the table given below. Note: The commands are case independent.
| Entry |
Default |
Type |
Comment |
x |
|
command |
Switch to extra functionality options menu. |
n |
|
command |
Create a new protective MBR. |
o |
|
command |
Print the MBR partition table. |
w |
|
command |
Write the MBR partition table to disk and exit. |
y |
|
parameter |
Do you want to proceed? |
Downloaded Installation ISO Files
- AntiX Linux:
antiX-23.2_x64-full.iso
- FreeBSD:
FreeBSD-14.2-Release-amd64-dvd1.iso
- OpenBSD:
install77.iso
References
Below are specific to AntiX Linux.
Below are specific to FreeBSD.
Below are specific to OpenBSD.


