- Click on Start, then Control Panel
- Choose Network and Internet -> Network and Sharing Center (or just Network and Sharing Center)
- Click Change Adapter Settings on the left
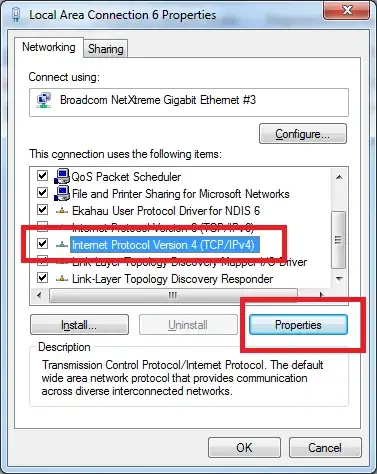
- Find the network adapter (NIC) that you are currently connecting with. Right-click it and click Properties (requires Admin access)
- Choose Internet Protocol version 4 (TCP/IPv4) and choose Properties
- Choose the option to Use the following IP address: and fill in the blanks for your network.
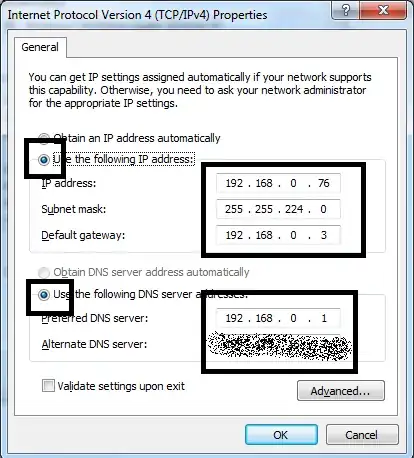
- Click OK, and close the next window. Verify you can access the Internet.
You will now have the IP Address always set to this address. Because it is getting set to whatever was found below, once your computers find the new address, it will remember it. Your router (more specifically, the DNS Service) will match the name with the IP Address, and HomeGroups are built to just know (using IPv6, usually).
How do you find out what you can put here?
- Click on Start, type
cmd and press Enter to bring up the Command Prompt.
- Type
ipconfig /all and press Enter
Check for the following items:
IPv4 Address. . . . . . . . . . . : 192.168.0.xxx
Subnet Mask . . . . . . . . . . . : 255.255.255.0
Default Gateway . . . . . . . . . : 192.168.0.xxx
DNS Servers . . . . . . . . . . . : 192.168.0.xxx
Your screen will output different numbers. Keep the information handy, and put them into the dialog above.
Type exit and press Enter to exit.

