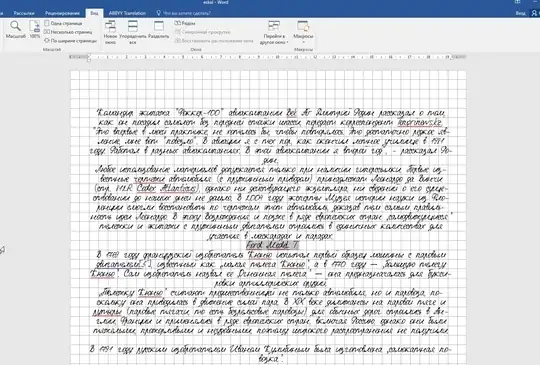
How to Print Gridlines in MS Word
Step 1 Open Microsoft Word. To print an existing document with
gridlines, click the “File” tab, select “Open,” then browse to and
double-click the Word file. Otherwise, Word starts you with a blank
document. Add text and images as desired.
Step 2 Click the “View” tab. Click a check into the “Gridlines” box in
the Show section of the ribbon. The gridlines now appear on your Word
document, but won’t print. Make any changes to the document as
desired, such as aligning your images in the grid.
Related Reading: How to See "No Mark Up" in MS Word
Step 3 Click the “One Page” button on the View tab’s ribbon. This lets
you see your entire Word document. Press the “Alt” key and the “Print
Screen” keys on your keyboard together, to make a copy of the Word
document on the screen.
Step 4 Open Paint from the operating system’s Accessories folder.
Click the “Paste” button on the ribbon, which pastes in the Word
document with the gridlines. Click the “Select” button the ribbon.
Draw a rectangle around just the Word document page and click the
“Crop” button on the ribbon. This is essential if you’ve gotten
another monitor, your sys tray, an instant messenger window or
something else in your Word document screen capture. After the crop,
you’re left with a replica of the Word document with the gridlines.
Step 5 Click the Paint button’s drop-down menu and select “Print.”
Choose your printer from the options, select how many copies to print
and click the “Print” button.
