0

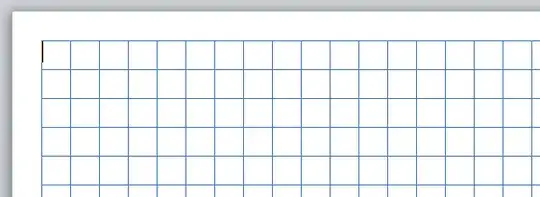
Word has a very convenient gridlines feature which enables you to view gridlines of any size you like, and align elements in your document with them. You can enable it in Layout-tab>Align>View gridlines.

These gridlines are not present when printing however, yet an option to enable their printing seems like an obvious feature to have.

I have looked far and wide and found no way to do it. There are many solutions online claiming to work, yet they simply don't. This MS Support article offers a solution (with an error in it- "Page Setup" is under the Layout tab and not the Design tab). But it simply falls flat on its second step, since a "Print Setup" tab doesn't exist in the "Page Setup" dialog box.

This superuser question doesn't contain a satisfying answer either. The first reply is linking an article that offers taking a screenshot of the page as a solution, which seems extremely archaic and worsens quality. The second reply offers to circumvent the grindlines feature itself and just stick a background on the Word document that looks like a grid, yet lacks all the great features and settings.

I've tried looking for solutions on both google and youtube, yet got none. Does anyone know how to do this? Printing gridlines seems like an extremely simple and obvious feature to have considering MS Word already has gridlines.
1 Answers1

3

Word does not have this capability. Those gridlines are intended to be non-printing.

Those gridlines are intended to help you in placing printing items on your page. The idea is that they will not be seen in the final product.

You could create and use graph paper templates.

You can download some templates from my website. The screenshot below is from the quarter-inch template.

screenhot

Here is a link to Word MVP Bill Coan's macro to create these. A printout of my modified version the macro is included in the download package on my website and below. There are no active macros in the download.

Here my modified version of the macro:

Sub GraphPaperCreate()
'   TechTrax - Bill Coan
'   http://web.archive.org/web/20070421084938/http://pubs.logicalexpressions.com/Pub0009/LPMArticle.asp?ID=596
'   modified by Charles Kenyon to:
'       reduce margins to .25
'       lighter line weight (.3 points rather than 2 points)
'       grid is set behind text in case there is text
'
' Sets margins at .25"  Charles Kenyon
'
    With ActiveDocument.PageSetup
        .TopMargin = InchesToPoints(0.25)
        .BottomMargin = InchesToPoints(0.25)
        .LeftMargin = InchesToPoints(0.25)
        .RightMargin = InchesToPoints(0.25)
    End With
'Declare variables
Dim sglBeginX As Single
Dim sglEndX As Single
Dim sglBeginY As Single
Dim sglEndY As Single
Dim Interval As Single
Dim LineCount As Integer
Dim VerticalGridLines As Integer
Dim HorizontalGridLines As Integer
Dim GridWidth As Single
Dim GridHeight As Single
Dim UserChoice As String
Dim oLine As Shape

'set the line weight, in points
Const LINE_WEIGHT As Long = 0.5   'changed from Integer = 2 by Charles Kenyon - this is the minimum

'set whether to delete the old grid,
'(assuming there is one)
Const DELETE_OLD_GRID As Boolean = True

'Delete the old grid
If DELETE_OLD_GRID Then
   On Error Resume Next
   ActiveDocument.range.ShapeRange.Delete
   On Error GoTo 0
End If

'Prompt the user to specify the size of squares desired

PromptUser: UserChoice = InputBox _ ("Enter size of squares in points:" & vbLf & vbLf & _ "(Value must be between 1 and 72)" & vbLf & _ "9 points = 1/8 inch" & vbLf & _ "12 points = 1/6 inch" & vbLf & _ "18 points = 1/4 inch" & vbLf & _ "24 points = 1/3 inch" & vbLf & _ "36 points = 1/2 inch" & vbLf & _ "48 points = 2/3 inch" & vbLf & _ "72 points = one inch", "Create graph paper")

'If the size requested is outside the allowed range,
'then go back and prompt the user again,
'but if user has clicked cancel, then quit
If IsNumeric(UserChoice) Then
   Interval = Val(UserChoice)
   If Interval > 72 Or Interval < 2 Then
      MsgBox "Value must be between 2 and 72.", _
        vbOKOnly + vbInformation, "Value out of range"
      GoTo PromptUser
   End If
ElseIf UserChoice = "" Then
   GoTo EndGracefully
Else
   GoTo PromptUser
End If

'Calculate beginning and ending positions
'based on page size and margins
With ActiveDocument.Sections.First.PageSetup
   sglBeginX = .LeftMargin
   sglEndX = .PageWidth - .RightMargin
   sglBeginY = .TopMargin
   sglEndY = .PageHeight - .BottomMargin
End With

'Calculate how many squares of the requested size
'can fit in the available area
HorizontalGridLines = Int((sglEndY - sglBeginY) / Interval)
VerticalGridLines = Int((sglEndX - sglBeginX) / Interval)

'Calculate the size of the finished grid, based on
'size of the number of lines and the size of the squares
GridWidth = VerticalGridLines * Interval
GridHeight = HorizontalGridLines * Interval

'draw the horizontal lines
For LineCount = 0 To HorizontalGridLines
   Set oLine = ActiveDocument.Shapes.AddLine( _
      BeginX:=sglBeginX, _
      BeginY:=sglBeginY + LineCount * Interval, _
      EndX:=sglBeginX + GridWidth, _
      EndY:=sglBeginY + LineCount * Interval)
   oLine.line.Weight = LINE_WEIGHT
   oLine.ZOrder msoSendBehindText   'Charles Kenyon
Next LineCount

'draw the vertical lines
For LineCount = 0 To VerticalGridLines
   Set oLine = ActiveDocument.Shapes.AddLine( _
      BeginX:=sglBeginX + LineCount * Interval, _
      BeginY:=sglBeginY, _
      EndX:=sglBeginX + LineCount * Interval, _
      EndY:=sglBeginY + GridHeight)
   oLine.line.Weight = LINE_WEIGHT
   oLine.ZOrder msoSendBehindText   'Charles Kenyon
Next LineCount

'release the oLine object from memory
Set oLine = Nothing

'end gracefully

EndGracefully:

End Sub

The grid produced could be placed in a header or footer to be background to ordinary text.