14

I have a pdf

and I'd like to convert it to a series of images, numbered 0001.jpg - XXXX.jpg ?

I found this so far

sips -s format png your_pdf_file.pdf --out your_png_file.png

but it seems to only to the first page of the pdf, and the quality of the outputted png seems not so good. Any suggestions?

4 Answers4

16

ImageMagick

The easiest way is to use ImageMagick. Install ImageMagick if you haven't already

brew install imagemagick --with-fontconfig --with-ghostscript --with-openjpeg --with-webp 

Convert the PDF document into a series of images

convert -quality 100 -density 200 -colorspace sRGB "The_Artificial_Intelligence_Crush_2018.pdf" -flatten output-%02d.jpg

More details on producing sharp, high-quality image using ImageMagick.

Ghostscript

ImageMagick uses Ghostscript in the background to perform the PDF conversion. So why not use Ghostscript directly?

gs -dNOPAUSE -sDEVICE=jpeg -r200 -dJPEGQ=100 -sOutputFile=document-%02d.jpg "The_Artificial_Intelligence_Crush_2018.pdf" -dBATCH

Reference

Convert PDF to image with high resolution How to convert multi-page PDF to images in command line How to convert a PDF document into Powerpoint slides

hanxue
  • 3,134
6

You can use convert ( ImageMagick ) to parse PDF files.

PNG output

Convert test.pdf to numbered PNG images:

convert -density 150 -trim test.pdf page%d.png

JPEG output

Convert test.pdf to numered JPEG images:

convert -density 150 -trim test.pdf -quality 100 -flatten -sharpen 0x1.0 page%d.jpg

As per @JBWhitmore's explanation from his great answer):

convert                  \
   -verbose              \
   -density 150          \
   -trim                 \
    <your-PDF-file>.pdf  \
   -quality 100          \
   -flatten              \
   -sharpen 0x1.0        \
    page%d.{png,pdf}

It results in the left image. Compare this to the result of my original command (the image on the right):
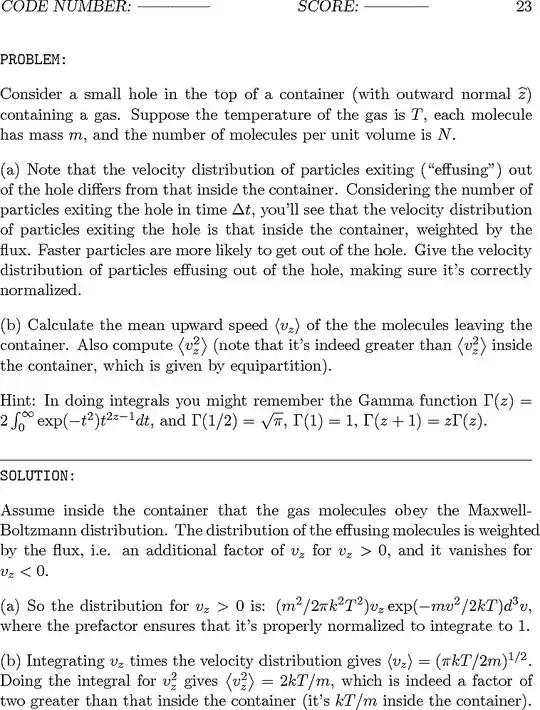
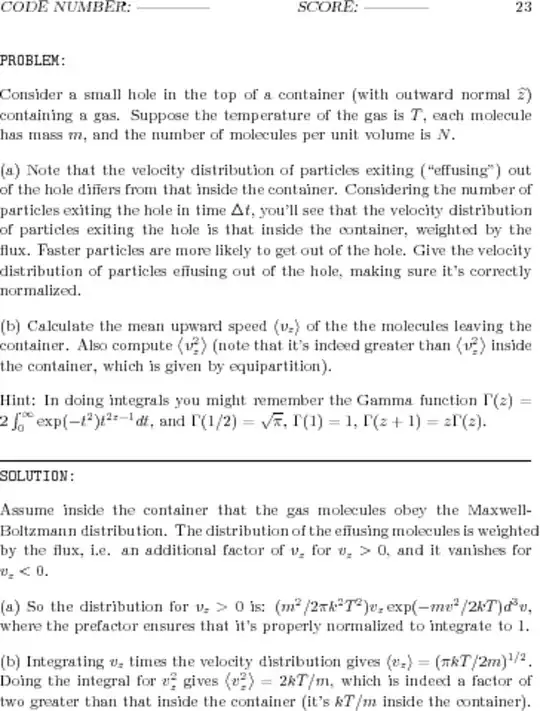
  

(To really see and appreciate the differences between the two, right-click on each and select "Open Image in New Tab...".)

Also keep the following facts in mind:

  • The worse, blurry image on the right has a file size of 1.941.702 Bytes (1.85 MByte). Its resolution is 3060x3960 pixels, using 16-bit RGB color space.
  • The better, sharp image on the left has a file size of 337.879 Bytes (330 kByte). Its resolution is 758x996 pixels, using 8-bit Gray color space.

So, no need to resize; add the -density flag. The density value 150 is weird -- trying a range of values results in a worse looking image in both directions!

Yasen
  • 224
6

Alternatively, you can use ghostscript which is not preinstalled on every Mac (that is what ImageMagick uses under the hood). You have to install it separately.

gs -dSAFER -dQUIET -dNOPLATFONTS -dNOPAUSE -dBATCH \ 
  # When converting multiple-page PDFs you should add "%d" to the filename-string 
  # which will be replaced with the sequence-number of the file
  -sOutputFile="outputFileName" \ 
  # Create a PNG-File with alpha-transparency
  -sDEVICE=pngalpha
  # resolution in DPI
  -r72 \ 
  # Use high grade text antialiasing. Can be 0, 1, 2 or 4
  -dTextAlphaBits=4 \
  # Use high grade graphics anti-aliasing. Can be 0, 1, 2 or 4
  -dGraphicsAlphaBits=4 \
  # If you are converting a CMYK-PFD to RGB-color you should use CIE-Color
  -dUseCIEColor \
  # use the PDFs Trim-Box to define the final image
  -dUseTrimBox \
  # start converting on the first side of the PDF
  -dFirstPage=1 \
  # convert only until the first page of the PDF
  -dLastPage=1 \
  # Path to the file you want to convert
  InputFile.pdf

For more information on how to use the CLI-Parameters, have a look at Using Ghostscript

Blindspots
  • 3,472
heiglandreas
  • 1,451
-3

just rename sample.pdf to sample.zip and then unzip sample.zip - it will create a folder with the images