9

I have tried the following solutions without success:

All of them allow me to see my NTFS external hard drive but none of them let me write to it. Actually, Paragon NTFS works until I plug the drive into a Windows Machine. Then I can't use it on my Mac without reformatting and Tuxera NTFS worked for a day then went into read only mode. Any ideas?

UPDATE

After trying multiple things, I found something that worked for me. I have Paragon NTFS installed. After formatting my harddrive to NTFS and adding files from my mac I plugged it into a Windows Machine. When I plug that same drive back into my mac it doesn't recognize it anymore unless I go into Disk Utility and repair the hard drive. This takes about a minute and leaves all files intact. Kinda a pain but it works for me needs.
zechdc
  • 1,287

8 Answers8

5

I am currently using Tuxera NTFS http://www.tuxera.com/community/ntfs-3g-download/ and can read and write to NTFS devices as small as 1GB to 3TB in Mac OS and then plug them into Windows with no issues.

I think the issue you are facing is that Mac is not picking up the correct driver.

  • After you have installed Tuxera, you can check in Settings => Tuxera NTFS and it should say Tuxera NTFS status: Enabled.
  • In your NTFS drive, is there a folder .Tuxera-NTFS and the file disable-driver?
  • When you plugin your device, does your Console (logging) application show any errors?
3

Give a man a fish and you feed him for a day; Teach a man to fish and you feed him for a lifetime

Now, let us learn to do this for free.

Before we start. Make sure your external name label is ONE word. That means there is no space in between.

my disk = WRONG

my_disk or my-disk or mydisk = CORRECT

Now

  1. Open Terminal [Command+Space+"terminal"]
  2. Type: sudo nano /etc/fstab
  3. In nano, type: LABEL=my_disk none ntfs rw,auto,nobrowse Note: my_disk is your disk name
  4. To save and exit Control+X and Enter and Enter
  5. [optional] For ease of access, we create a sym-link to desktop: In terminal -> sudo ln -s /Volumes ~/Desktop/Volumes

Later

When you don't need it anymore. It is as simple as:

In terminal sudo rm /etc/fstab

Done.

AFwcxx
  • 158
2

From here.

Assuming that brew in installed correctly :

$ brew cask install osxfuse
$ brew install ntfs-3g

Now, create the following folder :

$ sudo mkdir /Volumes/NTFS

You must identify the logical name of your harddrive, diskutil list will help you. In my case I found out that the disk I want to mount is called disk2s1.

$ sudo /usr/local/bin/ntfs-3g /dev/disk2s1 /Volumes/NTFS -olocal -oallow_other

Oups !

Error opening '/dev/disk2s1': Resource busy
Failed to mount '/dev/disk2s1': Resource busy
Mount is denied because the NTFS volume is already exclusively opened.
The volume may be already mounted, or another software may use it which
could be identified for example by the help of the 'fuser' command.


$ sudo umount /dev/disk2s1
$ sudo /usr/local/bin/ntfs-3g /dev/disk2s1 /Volumes/NTFS -olocal -oallow_other 

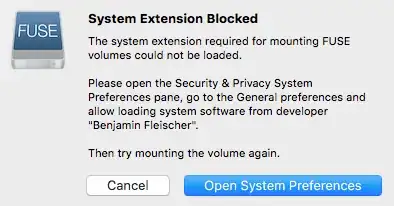
Now it works but you will have probably the following message : enter image description here

Allows the system software Benjamin Fleischer to do it's job and execute again :

$ sudo /usr/local/bin/ntfs-3g /dev/disk2s1 /Volumes/NTFS -olocal -oallow_other  

You should see something like that in your Finder window now :

enter image description here

snoob dogg
  • 123
  • 9
0

2020 and I still looked for the answer. Then I found Mounty app worked for me out of the box, hope it helps

0

NTFS-3G provides detailed instructions on its Wiki which has worked for me on a couple of different Macs already.

# unmount if necessary
sudo diskutil unmount /dev/disk1s1
# mount with ntfs-3g
sudo mkdir /Volumes/NTFS
sudo /usr/local/bin/ntfs-3g /dev/disk1s1 /Volumes/NTFS -o local -o allow_other -o auto_xattr -o auto_cache

(Use diskutil list to find the name of the NTFS partition).

xji
  • 808
0

Free solution from https://mounty.app/

brew install --cask macfuse
brew install gromgit/fuse/ntfs-3g-mac
brew install --cask mounty

You need homebrew.

pbies
  • 3,550
0

I recommend OSX FUSE paired with NTFS-3G.

Installation is fairly simple - first install OSX FUSE, then NTFS-3G. Follow installation instructions on OSX FUSE site.

This is a free solution which has never caused me any trouble (i.e. data or filesystem corruption). On the other hand, some other solutions (like simple /etc/fstab edit) had break my filesystem in the past.

kamituel
  • 306
-2

exFat. Free and already an option Tuxera costs money. I was also using Tuxera til it broke down on me. exfat works on both Windows and Mac machines.

Jay
  • 11